The second layout built in 3mm Scale. Occasional updates as it progresses to an exhibitable standard.Further 3mm ramblings on http://dorset3mm.blogspot.com/
Showing posts with label Buildings. Show all posts
Saturday, 30 March 2013
Saturday, 23 March 2013
Post Office extras.
Wednesday, 13 March 2013
Tuesday, 22 January 2013
Progress
Just a quick update and a couple of pictures- hopefully these show the slow progress that is being made.
Hopefully the detail and work is worth it as Teignfords next show gets ever closer!
The fencing is slowly advancing- I am amazed at how much is needed.
Pictures also identify areas where I haven't quite got it right- must refix the fencing by the tree!
Sunday, 30 December 2012
Farmyard Barn.
A couple more shots of the completed barn.
Please see http://dorset3mm.blogspot.com/ for the complete saga of constructing this building.
Saturday, 31 March 2012
A Gaggle of Huts.
Idling away my time the other evening produced some small iron huts for Teignford.
All are from published drawings in various publications. They range from the humble lamp huts, on the left to larger stores.
The only problem is how to curve the roofs. On Hennock, I cheated and rolled them with the corrugations. However, I wanted to get a little better with these so the plasticard, from which they are made, had to be heated up to form a gentle curve. The small huts were no problem but I slightly melted the large roof. But with real life showing some degredation in use, this doesn't appear too bad- What do you think?
All are from published drawings in various publications. They range from the humble lamp huts, on the left to larger stores.
The only problem is how to curve the roofs. On Hennock, I cheated and rolled them with the corrugations. However, I wanted to get a little better with these so the plasticard, from which they are made, had to be heated up to form a gentle curve. The small huts were no problem but I slightly melted the large roof. But with real life showing some degredation in use, this doesn't appear too bad- What do you think?
Friday, 23 March 2012
Cattle Dock.
Before you all get sick of looking at bits of plastic sheet and tiny bits of Microstrip- It's finished.
There had to be some compromises ,such as bridge rail on wooden posts but I couldnt face filing thirty odd holes to take bullhead rail.
Luckily I found some T shaped strip produced by Plastruct which I have used as a representation of bridge rail and I don't think it looks too bad, I would be interested in your comments!
The whole lot was given a couple of very light dustings of grey undercoat then the rails dry brushed with a grey/green and brown to add a bit of relief. I may have underdone it but it passes when not at the
end of a camera lens.It now has some landscape around its mounting site an seems to bed into the landscape quite well. The boards between the rails have been cut and need painting and some drainage grilles added. I need to source information about the size and construction of the water troughs that would have been sited within the dock- any info gratefully recieved.
There had to be some compromises ,such as bridge rail on wooden posts but I couldnt face filing thirty odd holes to take bullhead rail.
Luckily I found some T shaped strip produced by Plastruct which I have used as a representation of bridge rail and I don't think it looks too bad, I would be interested in your comments!
The whole lot was given a couple of very light dustings of grey undercoat then the rails dry brushed with a grey/green and brown to add a bit of relief. I may have underdone it but it passes when not at the
end of a camera lens.It now has some landscape around its mounting site an seems to bed into the landscape quite well. The boards between the rails have been cut and need painting and some drainage grilles added. I need to source information about the size and construction of the water troughs that would have been sited within the dock- any info gratefully recieved.
Wednesday, 21 March 2012
Cattle Dock.
With the upright posts cut there is the small matter of making 30 odd square holes in the base.
First a pilot hole was drilled at each post point, then opened out to something near the post width, then each hole was filed out to make a square just large enough to take the post.
As can be seen, several posts are in place, I must fix the rest of the base to keep the floor square- it has slightly warped since making the holes and fitting the first few postes.
I have some 1.2mm T shaped plastruct which, although wrong for wooden posts, will give a representation of Bridge Rail along the sides.
First a pilot hole was drilled at each post point, then opened out to something near the post width, then each hole was filed out to make a square just large enough to take the post.
As can be seen, several posts are in place, I must fix the rest of the base to keep the floor square- it has slightly warped since making the holes and fitting the first few postes.
I have some 1.2mm T shaped plastruct which, although wrong for wooden posts, will give a representation of Bridge Rail along the sides.
Monday, 19 March 2012
Signal Box.
Cracking on with the buildings, next is the Signal Box.
This will be a composite of mounting card and plastic strip. As can be seen, the shell of the Box has been cut out and the four base walls glued together. It always seems very basic at this stage but probably the easiest part has been done.
For windows, Allan at Worsley Works has sent me some windows and door etches, these can be seen in the lower picture and are as usual of top quality.
Next job is to cover the base with brick paper- which one I have yet to decide- it was quite usual to find a different building material on Signal Boxes than on the main buildings.
This will be a composite of mounting card and plastic strip. As can be seen, the shell of the Box has been cut out and the four base walls glued together. It always seems very basic at this stage but probably the easiest part has been done.
For windows, Allan at Worsley Works has sent me some windows and door etches, these can be seen in the lower picture and are as usual of top quality.
Next job is to cover the base with brick paper- which one I have yet to decide- it was quite usual to find a different building material on Signal Boxes than on the main buildings.
Saturday, 17 March 2012
Cattle Dock.
It doesn't look a lot at the moment, but, it will eventually become the Cattle Dock at Teignford.
Therein lies a story.I spend a fair amount of time scanning through books looking for suitable subjects to model.
A Pictorial History of Great Western Architecture is one of my sources and it was inside this tome that the plan was found. However, I could not make out the dimensions, such was the reduction for publishing purposes.
Here the power of the internet comes in. I belong to several groups and I put a plea for information on the GWR e-list. The writer of the book himself, Adrian Vaughan answered my plea and provided all the answers to my questions, even sending an enlargement for my use. Thank you Adrian, I hope my efforts will make the effort worthwhile.
Therein lies a story.I spend a fair amount of time scanning through books looking for suitable subjects to model.
A Pictorial History of Great Western Architecture is one of my sources and it was inside this tome that the plan was found. However, I could not make out the dimensions, such was the reduction for publishing purposes.
Here the power of the internet comes in. I belong to several groups and I put a plea for information on the GWR e-list. The writer of the book himself, Adrian Vaughan answered my plea and provided all the answers to my questions, even sending an enlargement for my use. Thank you Adrian, I hope my efforts will make the effort worthwhile.
Thursday, 15 March 2012
Engine Shed-Completed.
At long last and the use of much midnight oil, the Shed is complete.
It has to be mounted on an extra sheet of card because- as many elderly sheds found out- a 45XX wouldn't go into it! It does now-just. The extra foundation will be trimmed a little and a hut will be joined to the rear quarter when planted. There is also the matter of an access ladder, I have some but until fixed this won't be attached.
I looked at the vents atop the building and eventually, after scrapping much card and plastic, a brainwave. I had some featheredge plastic card- from Evergreen I think-so pieces were cut and filed to size and glued in. Then the whole lot was painted and is ready to become attached to it's new home.
These views show my wonky application of the roofing slates. They are actually 00 Gauge Superquick, cut in lengths of two slates and stuck on, it's not until afterwards and the enlarged image from the camera that I realise Specsavers needs a visit.
It has to be mounted on an extra sheet of card because- as many elderly sheds found out- a 45XX wouldn't go into it! It does now-just. The extra foundation will be trimmed a little and a hut will be joined to the rear quarter when planted. There is also the matter of an access ladder, I have some but until fixed this won't be attached.
I looked at the vents atop the building and eventually, after scrapping much card and plastic, a brainwave. I had some featheredge plastic card- from Evergreen I think-so pieces were cut and filed to size and glued in. Then the whole lot was painted and is ready to become attached to it's new home.
These views show my wonky application of the roofing slates. They are actually 00 Gauge Superquick, cut in lengths of two slates and stuck on, it's not until afterwards and the enlarged image from the camera that I realise Specsavers needs a visit.
Friday, 9 March 2012
Engine Shed.
More card and a new knife blade see's the new shed cut out and the pieces stuck together.
Working the same way as for the Goods Shed, this has been made in exactly the same way.
The drawings are based on the size of Helston with the addition of a water tower the dimensions of which have been taken from Tetbury but height wise is akin to Princetown.
Need to search the bits box for bits and pieces although I have found an old Superquick OO glazing sheet which has windows of just the right size.
Working the same way as for the Goods Shed, this has been made in exactly the same way.
The drawings are based on the size of Helston with the addition of a water tower the dimensions of which have been taken from Tetbury but height wise is akin to Princetown.
Need to search the bits box for bits and pieces although I have found an old Superquick OO glazing sheet which has windows of just the right size.
Wednesday, 7 March 2012
The Finished Article.
Well the second building is now complete and I am fairly pleased with it.
The tiling along one side is a bit wavy on the edge but to put it right will probably mean destroying the whole thing.
Now it needs to be positioned on the layout and bedded in eventually.
So- what next? The Engine Shed I think, have the plans of Helston but want the Water Tank integral with the building so will adapt a bit of Mortenhampsted shed as well.
Let me know what you think.
The tiling along one side is a bit wavy on the edge but to put it right will probably mean destroying the whole thing.
Now it needs to be positioned on the layout and bedded in eventually.
So- what next? The Engine Shed I think, have the plans of Helston but want the Water Tank integral with the building so will adapt a bit of Mortenhampsted shed as well.
Let me know what you think.
Monday, 5 March 2012
Goods Shed Doors.
This is the job I have not been looking forward to- oh and the roof also.
These little suckers took me best part of a day to mark out, cut out, score with planking and paint (two colours). Precision Light and Dark Stone if anyones interested!
When this was dry the door mounts were cut from Microstrip. These were superglued to the doors. When this lot had set, the carriage runner was cut to length- a square U section moulded strip- and the wheels were represented by thin discs of plastic rod- how many did I loose? Oh how we laughed-NOT.
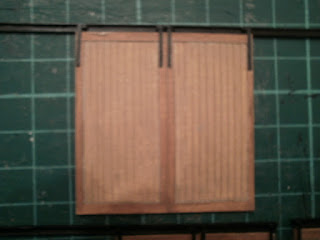
These were Mek'd into the carriage runner and then the door hangers adhered with the same.
When this lot was cured- I hope you're keeping up-
the whole carriage assembly and hangers were painted with Railmatch Matt Black Acrylic.
This needs to be completely dry before I attempt to position them.
Oh- I did manage to remember the chimney- this i found whilst rooting round the bits box.
I also cheated with the windows, also finding some pre-printed glazing in the same box.
This is one box that I cannot do without- it would have cost a fortune to source the odds and ends that lurk at the bottom of these unsung treasure troves.
These little suckers took me best part of a day to mark out, cut out, score with planking and paint (two colours). Precision Light and Dark Stone if anyones interested!
When this was dry the door mounts were cut from Microstrip. These were superglued to the doors. When this lot had set, the carriage runner was cut to length- a square U section moulded strip- and the wheels were represented by thin discs of plastic rod- how many did I loose? Oh how we laughed-NOT.
These were Mek'd into the carriage runner and then the door hangers adhered with the same.When this lot was cured- I hope you're keeping up-
the whole carriage assembly and hangers were painted with Railmatch Matt Black Acrylic.
This needs to be completely dry before I attempt to position them.
Oh- I did manage to remember the chimney- this i found whilst rooting round the bits box.
I also cheated with the windows, also finding some pre-printed glazing in the same box.
This is one box that I cannot do without- it would have cost a fortune to source the odds and ends that lurk at the bottom of these unsung treasure troves.
Saturday, 3 March 2012
I have it covered.
The main carcass has been covered. I have used 'N' Gauge Random Stone thin card sheets as supplied by Metcalfe -Cat No. PN115. These packs have five sheets of each thick and thin card which have cut and random stone on each sheet. The grey is a little light but I think a wash of a darker colour will make the building tone in with the Station Building.. The interior is a hotch potch of scrap building sheets which make it look a little more authentic. I also cut a sheet to cover the inner wall that abuts the platform to be fitted after the glazing was stuck in place.

Thursday, 1 March 2012
Goods Shed.
First testing of the positioning of Teignfords Goods Shed.The building will butt up against the platform. As can be seen, the removal of the second siding ,to the left of the shed would have made the area too cramped.
This does affect the operational capabilities somewhat but the yard area would have been too tight and the possibilities of lorries backing up to the loading bay all but impossible.
Now I am sure that the size and position are correct I can get on and detail the carcass.
Tuesday, 28 February 2012
Goods Shed Roof.
This is the basis for the Goods Shed roof.
Two pieces of mounting card cut to size and glued to gether with a couple of braces to the same profile as the apex of the end walls.
Some card has also been cut for the woodwork under the eaves which will carry the guttering.
I am a great believer in keeping it simple rather than super detailing bits that no one will see, rigidity and longevity are more important. This philosophy has sttod the test of time with the buildings on Hennock and I don't see any reason to change now.
Two pieces of mounting card cut to size and glued to gether with a couple of braces to the same profile as the apex of the end walls.
Some card has also been cut for the woodwork under the eaves which will carry the guttering.
I am a great believer in keeping it simple rather than super detailing bits that no one will see, rigidity and longevity are more important. This philosophy has sttod the test of time with the buildings on Hennock and I don't see any reason to change now.
Sunday, 26 February 2012
Teignford Goods Shed.
Well, the knives have been out!
The main pieces of the goods shed have been cut out and glued together.
Using Ross all purpose white glue, which it says on the container- Bonds Fast Dries Clear. This I picked up from our local Discount Store a few years ago and it does exactly that. The glue grabs fairly quickly so you don't have to spend half the evening holding two pieces of cardboard together.
I got to the stage seen in a couple of hours and the next morning all had hardened squarely and the mitred corners appear to be neat.
The centre image shows that a side and end were stuck together and left to set and then the two halves joined.
Corner braces were added to aid it all being square and to add a bit of strength. It now comes to the decision on what to clad it in.
Must get into the store cupboard to see what I have in stock.
The main pieces of the goods shed have been cut out and glued together.
Using Ross all purpose white glue, which it says on the container- Bonds Fast Dries Clear. This I picked up from our local Discount Store a few years ago and it does exactly that. The glue grabs fairly quickly so you don't have to spend half the evening holding two pieces of cardboard together.
I got to the stage seen in a couple of hours and the next morning all had hardened squarely and the mitred corners appear to be neat.
The centre image shows that a side and end were stuck together and left to set and then the two halves joined.
Corner braces were added to aid it all being square and to add a bit of strength. It now comes to the decision on what to clad it in.
Must get into the store cupboard to see what I have in stock.
Wednesday, 21 December 2011
Tools of the trade.
For marking out, these are some of the aids used.
Most important is a straight edge, in this case a 1ft/30cm steel ruler. Also have a six inch rule for use when something a little smaller is needed.
Two types of compass, self explaitory really-large and small. To mark out there is a Rotring propelling pencil with .5mm lead-this I have had for at least 25 years and proves that it pays to get the best you can afford. A rubber, this one bought in Majorca erases all unwanted lines or mistakes and is fairly soft.
Not shown are the knives I use, mainly a snap off type as the card can be fairly high on usage of blades.
Most important is a straight edge, in this case a 1ft/30cm steel ruler. Also have a six inch rule for use when something a little smaller is needed.
Two types of compass, self explaitory really-large and small. To mark out there is a Rotring propelling pencil with .5mm lead-this I have had for at least 25 years and proves that it pays to get the best you can afford. A rubber, this one bought in Majorca erases all unwanted lines or mistakes and is fairly soft.
Not shown are the knives I use, mainly a snap off type as the card can be fairly high on usage of blades.
Monday, 19 December 2011
Take a sheet of card.
Whilst the wiring is being finished it is time to start the many buildings needed for Teignford. For this I use offcuts of Daler Mounting Card obtained as offcuts from my friendly local art shop. These come in various shapes and sizes and the ones being used are approximately A4 size with a slightly uneven finish on one side-this side is also green but no matter as it will be covered with brickpaper anyway.
The lower pic shows the start of marking out with the main dimensions marked.
Next post see's the tools used for this process.

The lower pic shows the start of marking out with the main dimensions marked.
Next post see's the tools used for this process.

Subscribe to:
Posts (Atom)


